1985 W124 230E Restoration Part One
A two-part article on the restoration of a 1985 Mercedes W124 230E.
CLASSIC CAR RESTORATIONS
Admin
4/29/20257 min read
In this two-part article, we provide an overall view of the key areas that were worked on and what to keep in mind when venturing into the world of classic car restorations. Pretty sure there are quite a few areas that were inadvertently skipped or not mentioned as I'm writing this blog purely from memory...
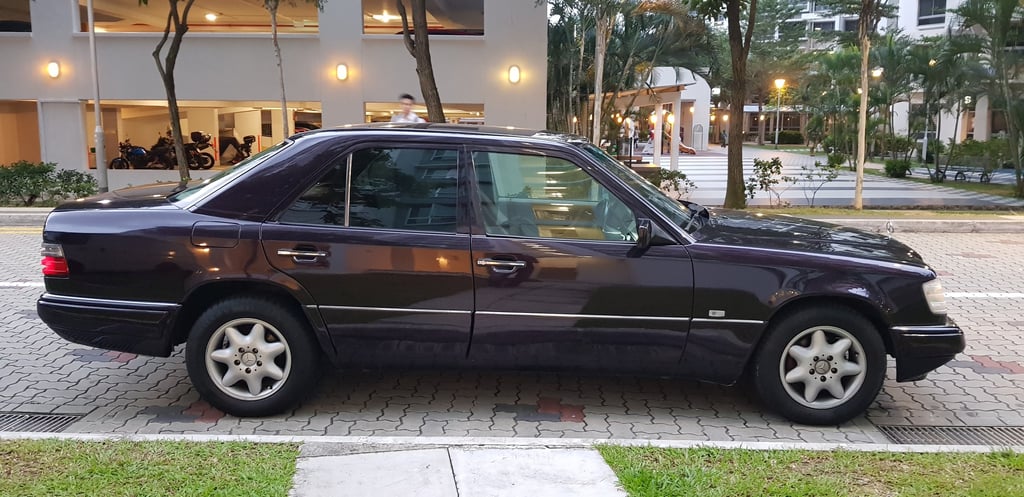
It was in early 2019 that restoration of this 1985 Mercedes W124 230E really began in earnest. I had been hunting for the parts I would most likely require for quite some time and was 100% prepared to undertake a ground up restoration. After establishing that the car had no rust spots, I revisited the list of areas I wanted to address and realized a whole lot of work (50% project car?) was in store for me. Although some work had been done on the car over the years, I had an idea of the areas I would need to prioritize. Fortunately, the quality of Mercedes cars from the 1980s till the mid 1990s was top notch. Some say this was indeed the golden era for Mercedes. Above was roughly the start point of how the car looked behind a coffee shop when I embarked on the restoration! It had wheels off a C-class and tires with an incorrect profile.
The first step was to piece together the car’s overall needs and work out a rough budget for the restoration. The entire list was basically "Must-Do’s” with very little “Extras” or "Good to Have" as almost every aspect of the car was going to be worked on and refreshed. I was also keen to ensure that no aftermarket parts were used. Stock is always best! As with cars of this vintage, the upholstery had previously been worked on and refurbished, but the door cards looked tired. I decided to maintain the same color scheme and to refurbish the existing panels and parts that were already on the car as much as possible. The duration of this restoration was very dependent on the availability of the "new old stock" or NOS and replacement parts, some of which had to sourced from places as far as the USA, Germany, UK, Turkey and Japan!
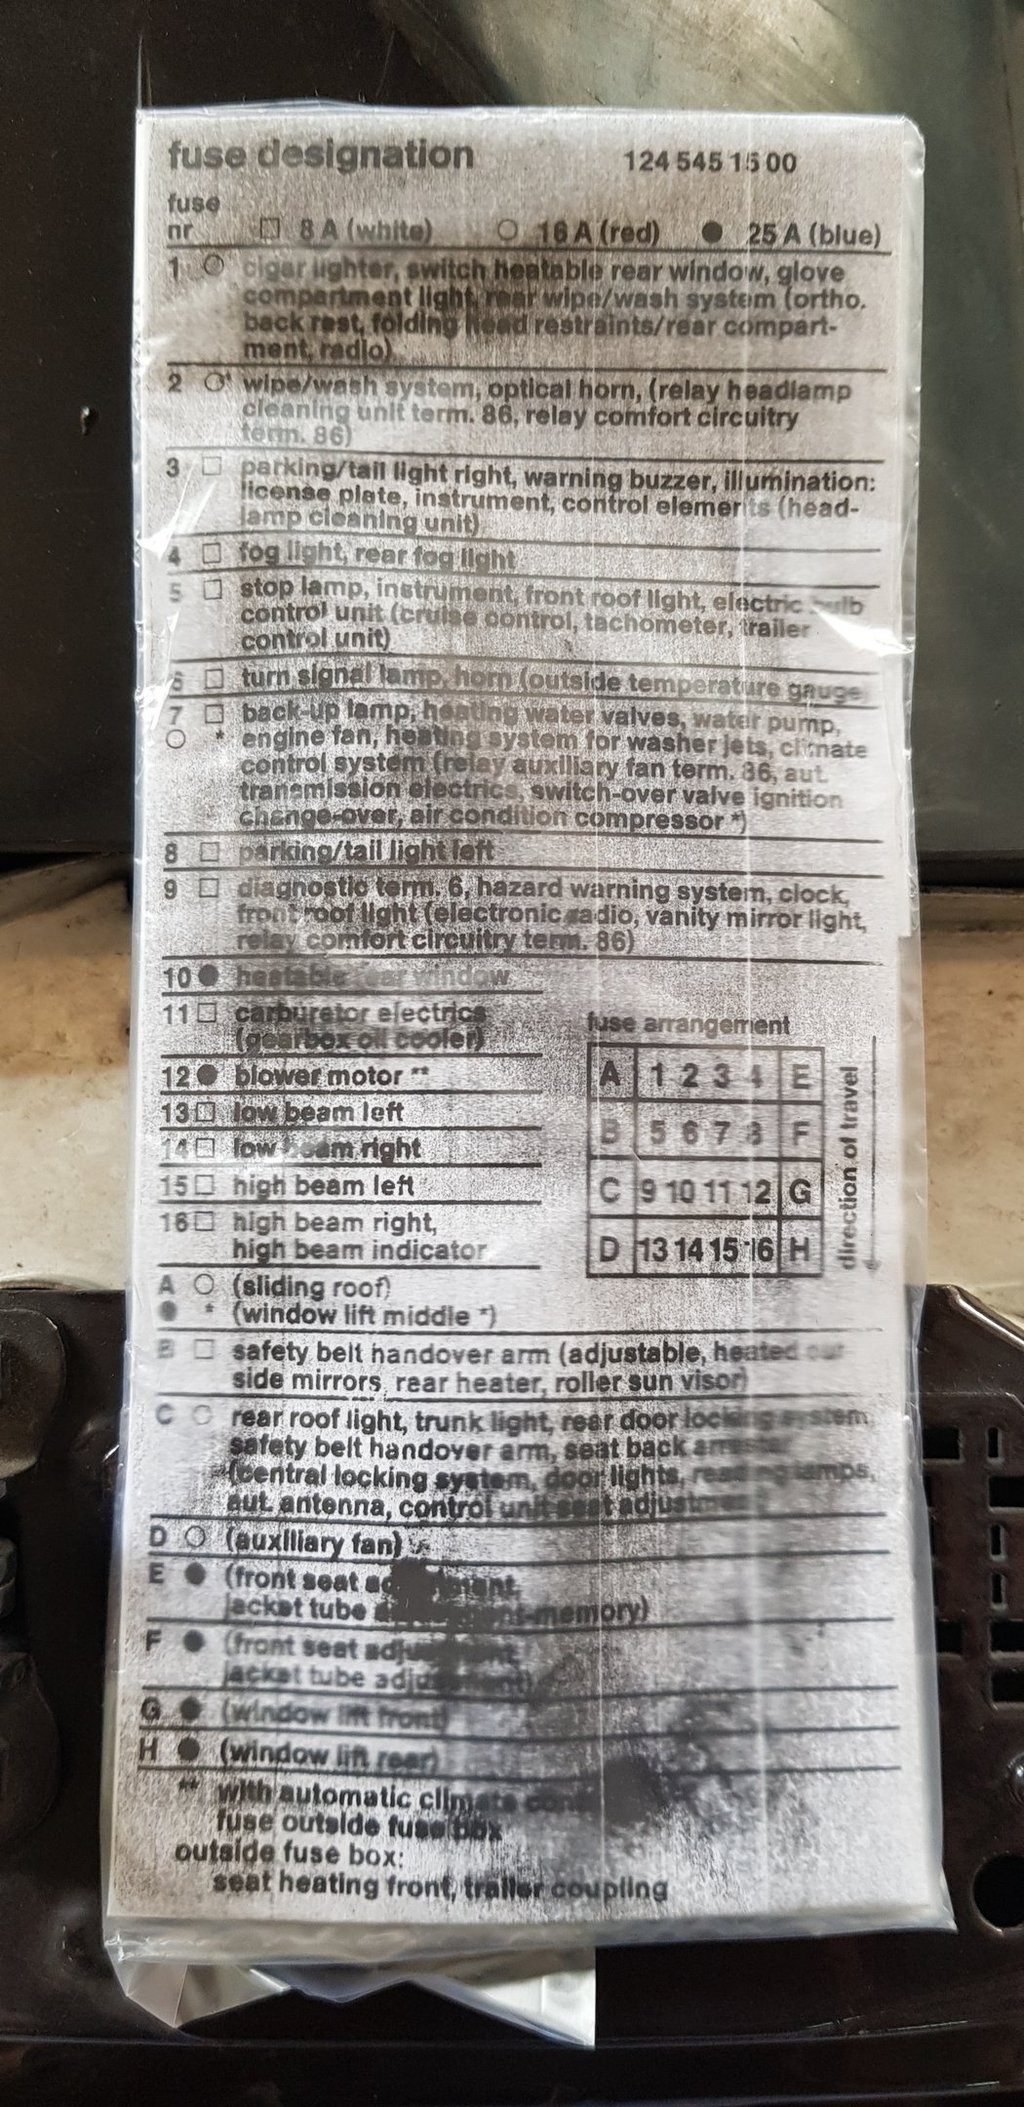
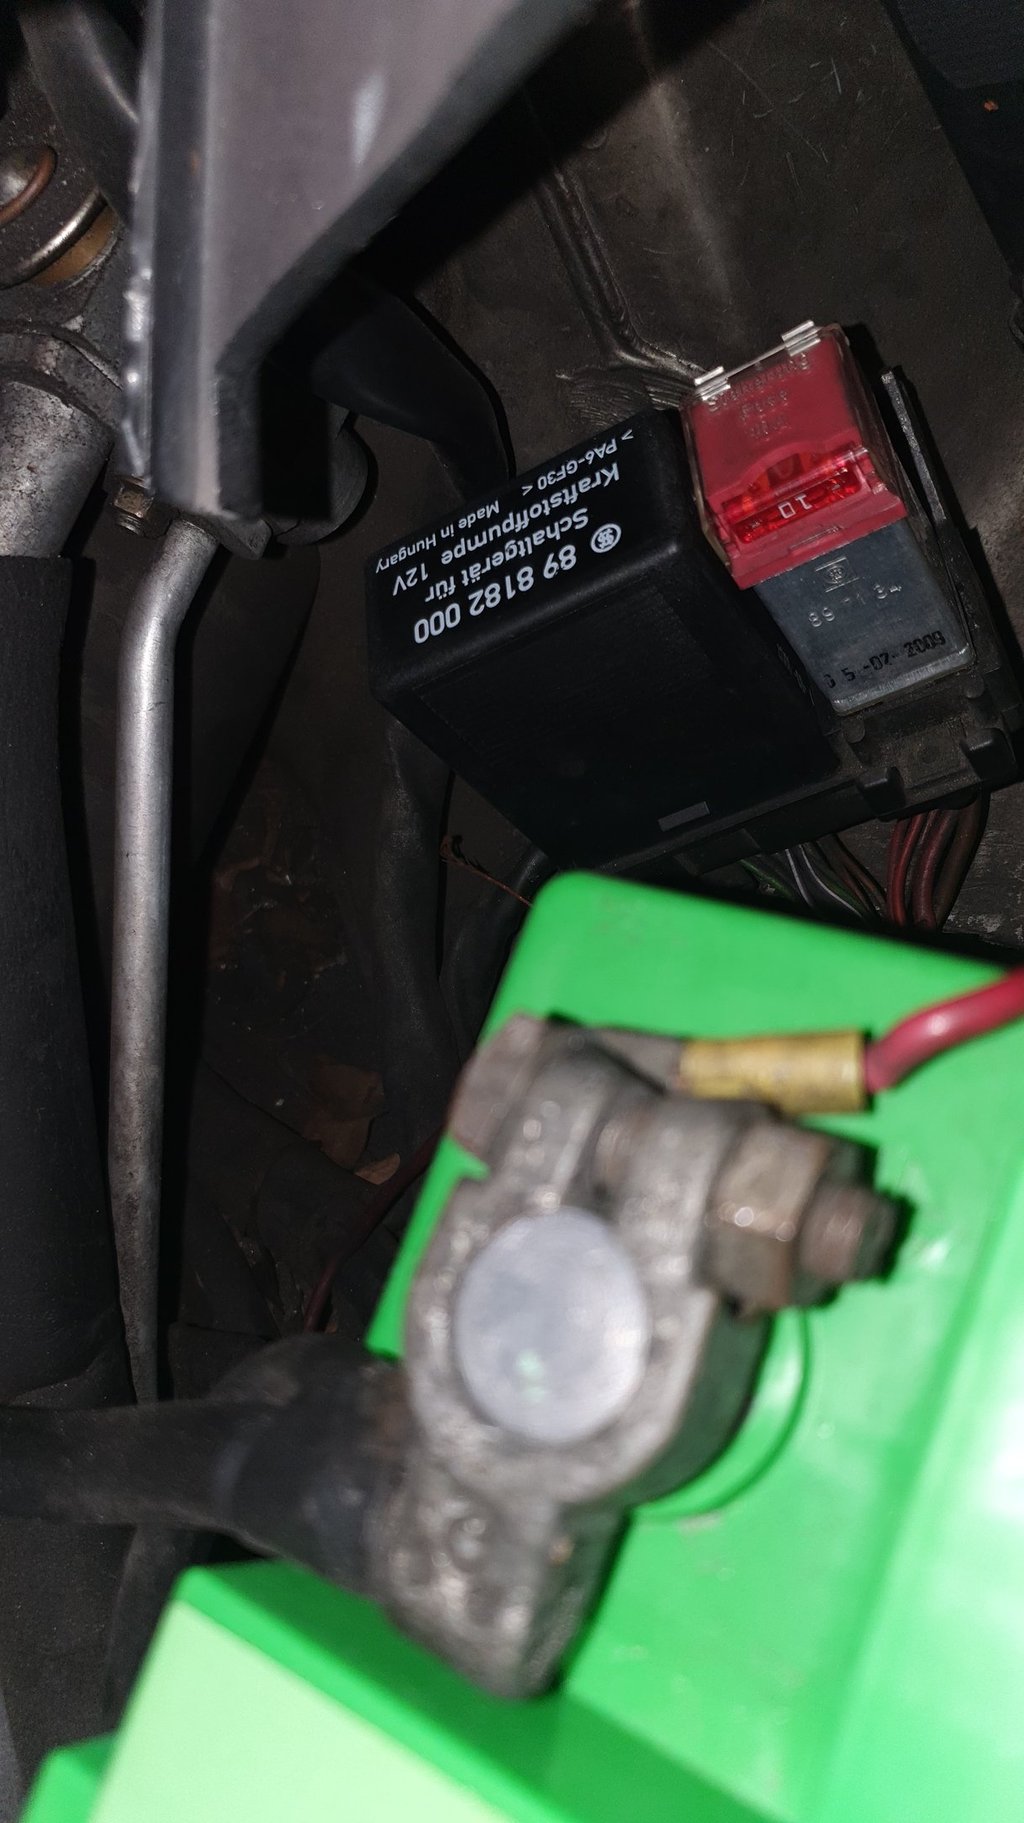
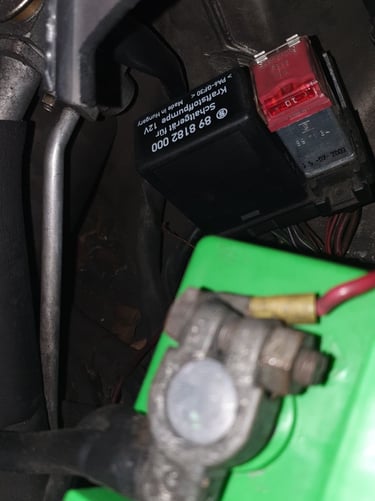
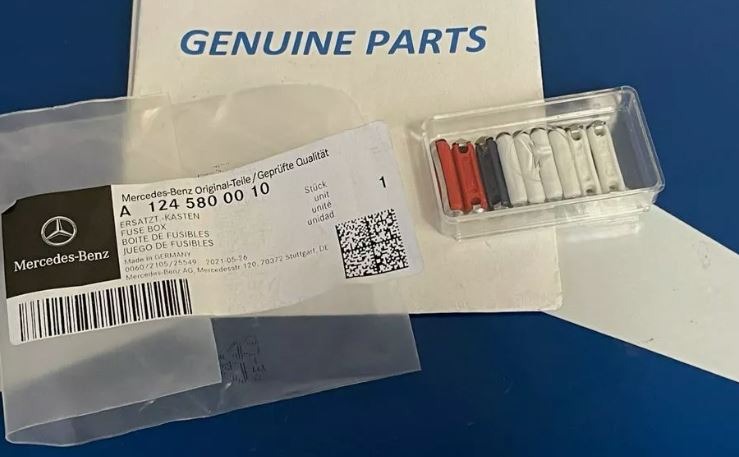
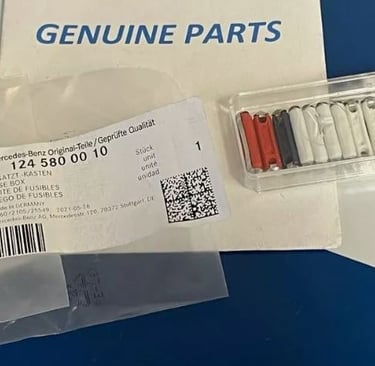
As the car's inspection was due, I needed to get the car in the best possible state and ready for the annual inspection. There was 1 warning light for "light bulb", which turned out to be the rear license plate bulb that was an easy fix. Next checked that all the fuses were in order and replaced the fuses that looked in poor condition with original fuses. Many a time issues with these older Mercedes cars can be traced back to something as simple as fuses. Next was to replace the Over-voltage protection relay (OVP) and Fuel Pump Relay (FPR) to prevent any electrical related issues. The OVP and FPR are the two most common culprits when it comes to the engine cutting out while in operation and difficulty in starting the car. The OVP is an essential control unit that works to regulate the flow of current through to your vehicle’s ECU. An example of the OVP in operation is when jump-starting a vehicle – the unit prevents too much energy from surging through to the ECU and thus protects essential systems such as the Idle Control Unit, ABS and Injection System. The FPR controls the fuel pump and it's quite useful to have a spare in the boot at all times.
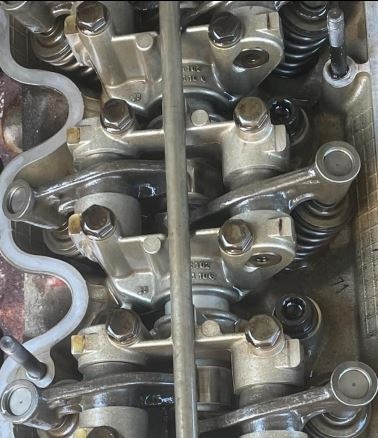
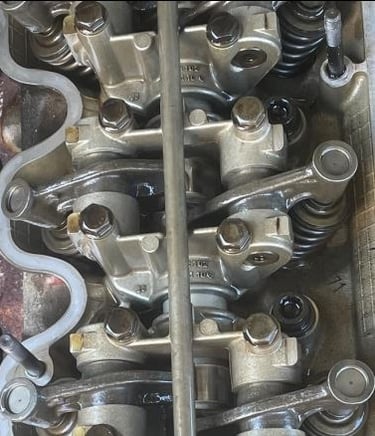
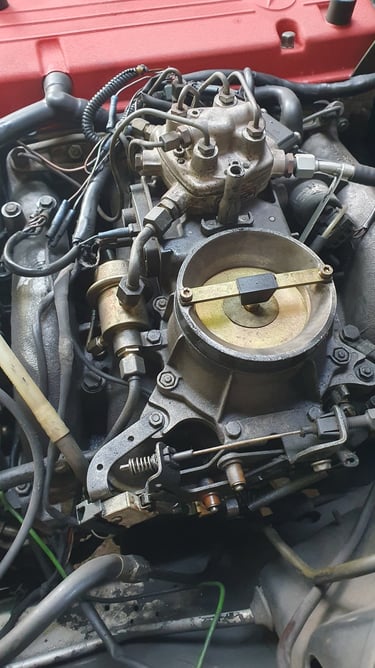
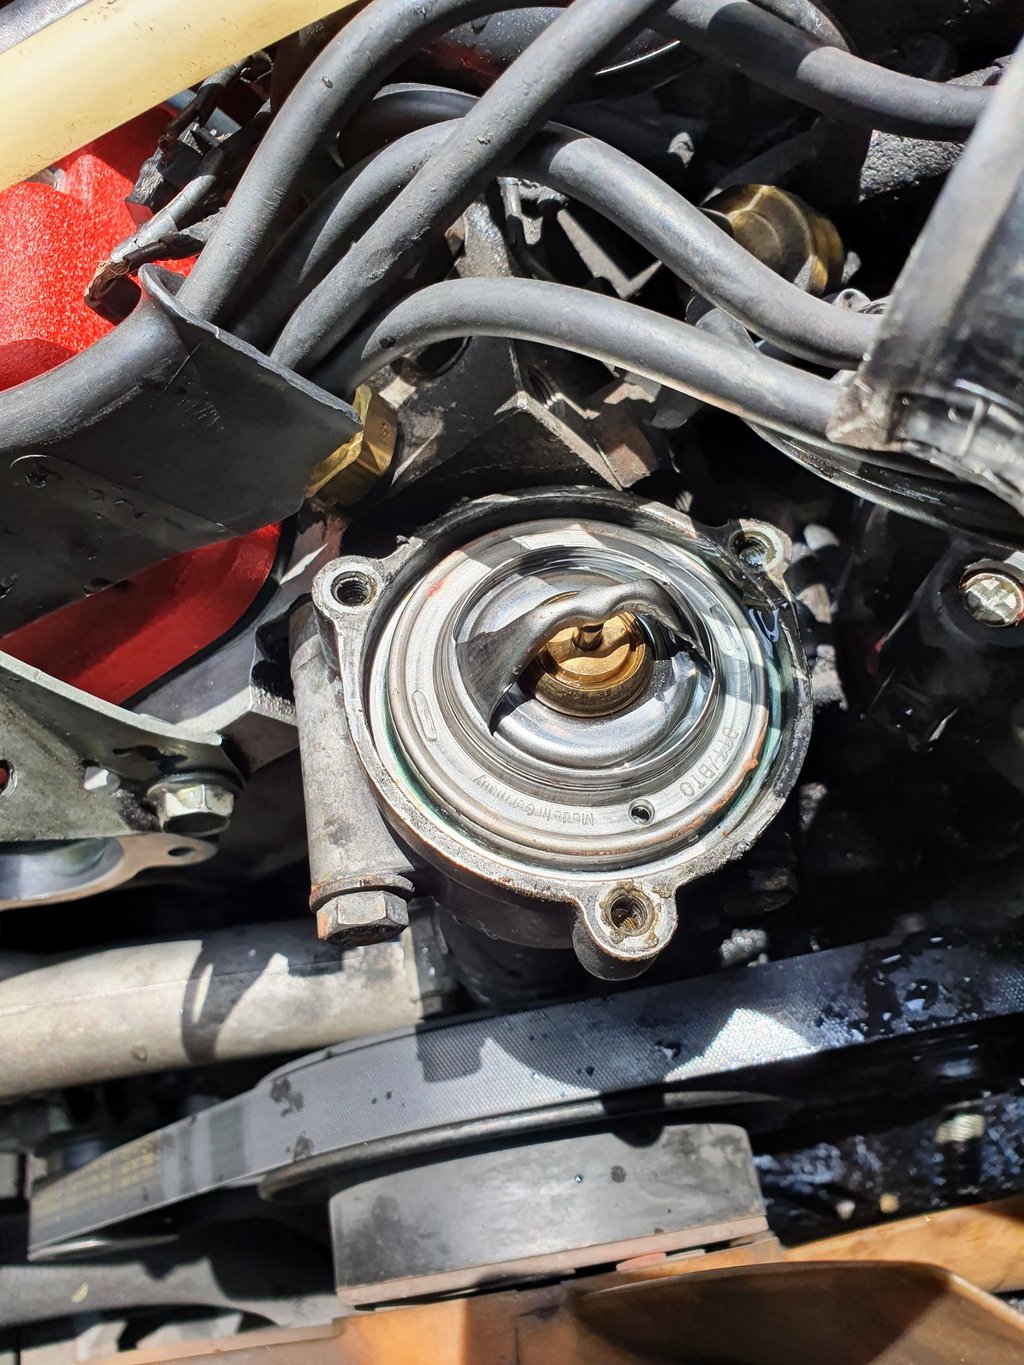
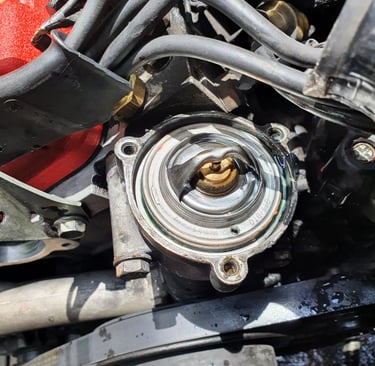
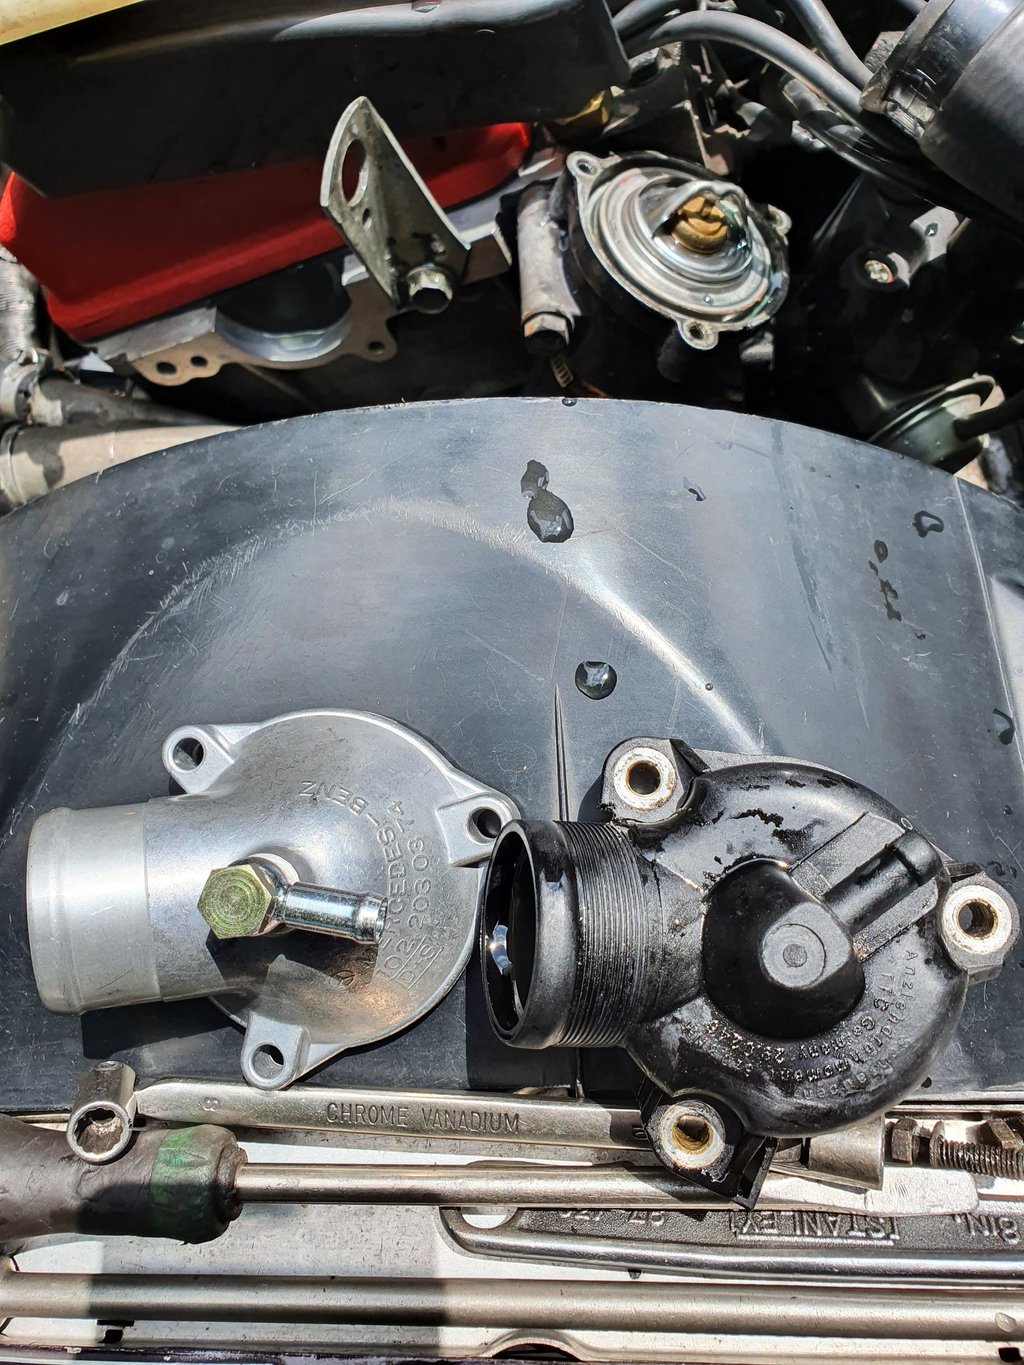
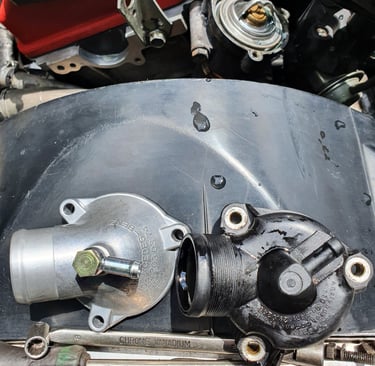
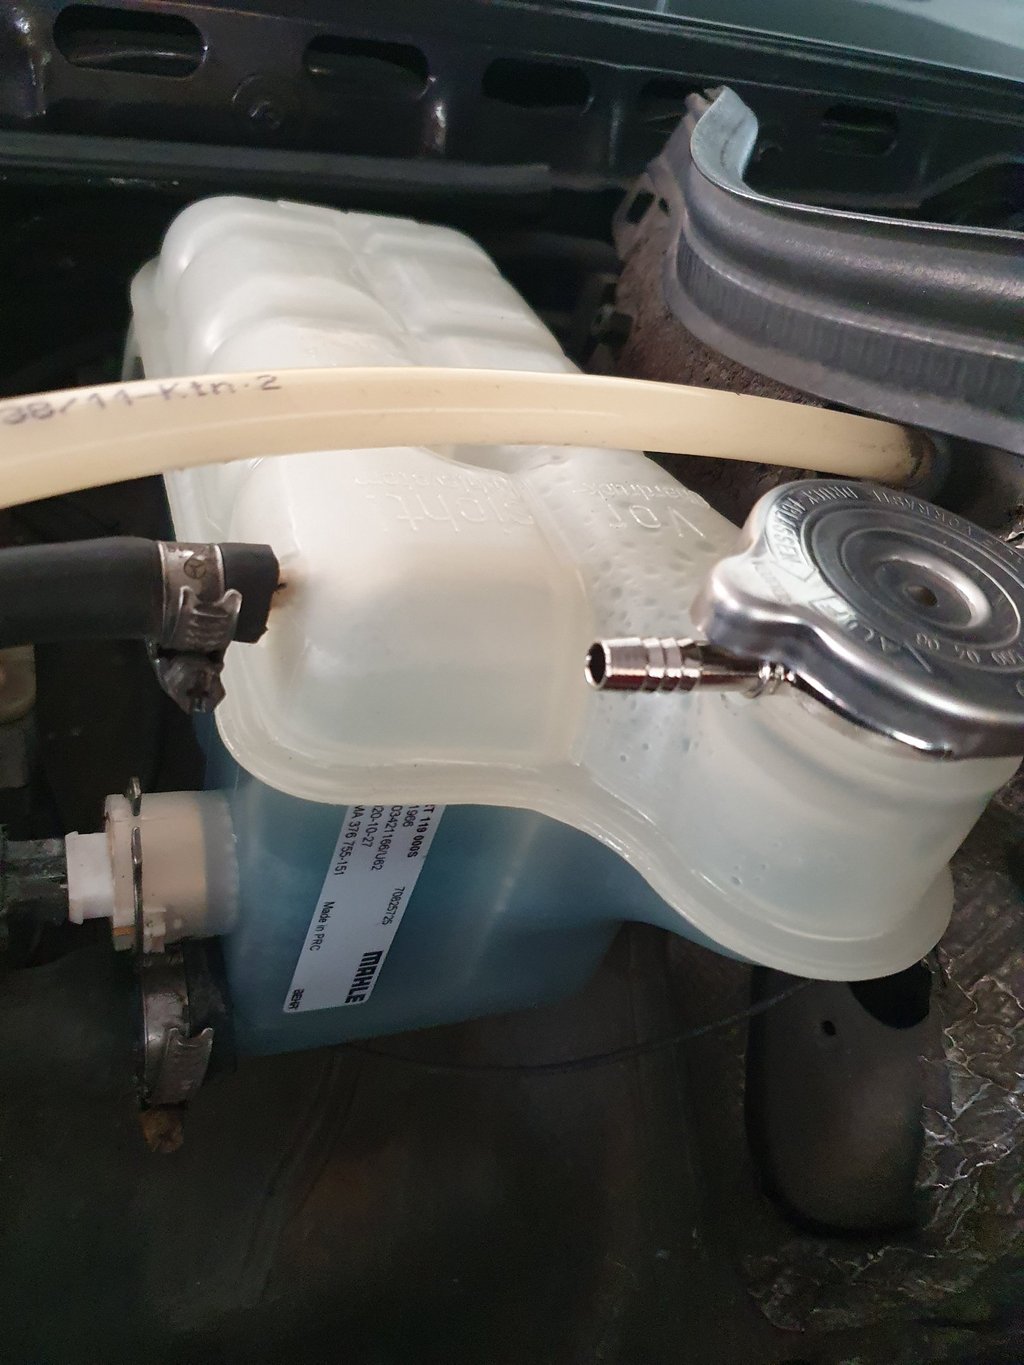
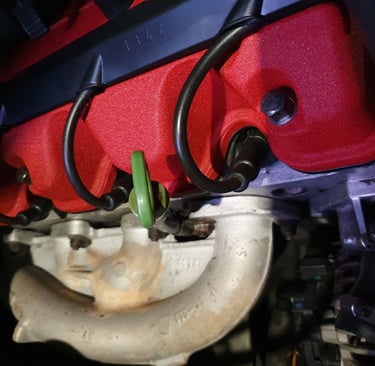
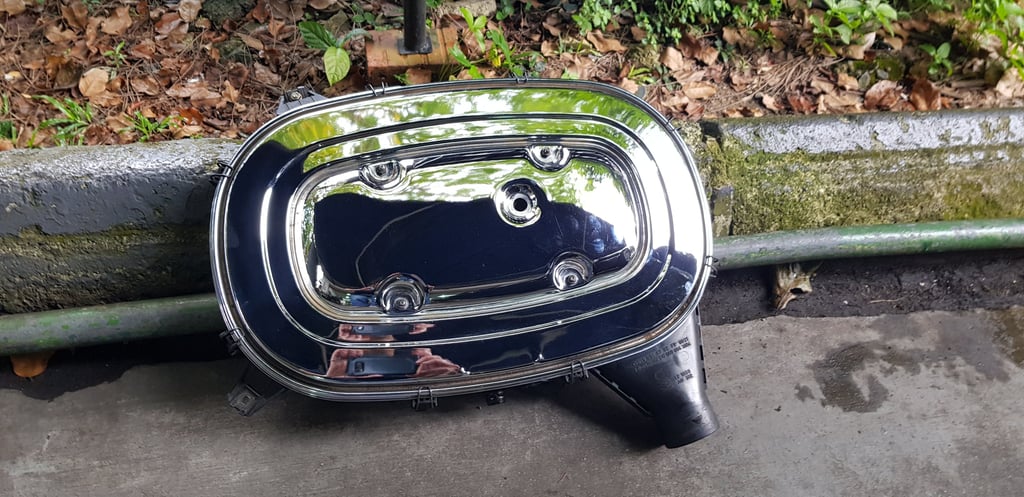
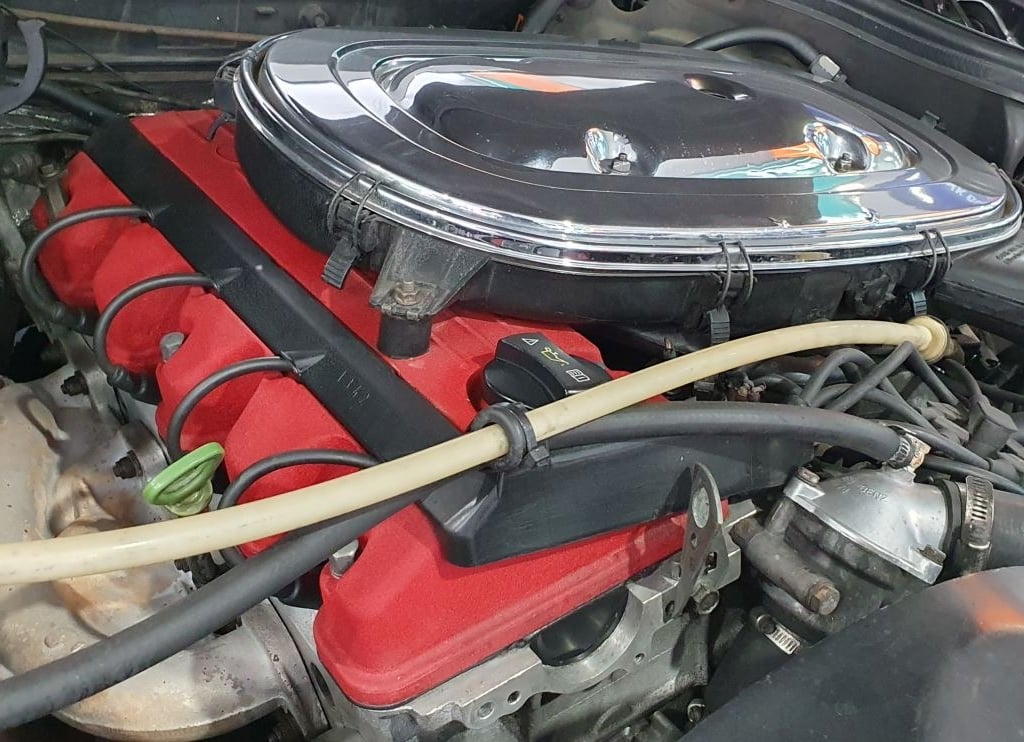
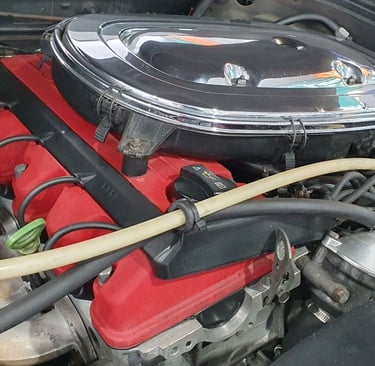
It was time to get down to doing a full engine overhaul. This also included a fresh set of hydraulic lifters and rocker arms. These tend to "stick" which results in a loud tapping noise during engine operation. As a "while in there" job, decided to send the valve cover for a professional sandblasting and refurbishment using a Ferrari F430 Prismatic red powder coating process. Next job was to rebuild the distributor, new rotor and a new ignition coil. Also replaced all vacuum hoses under the air filter housing as these control idling rpms. A new set of PCV hoses were also installed. The power steering assistance was uneven and loud whining noises persisted despite attempts to remove air from the system. There was also noticeable aeration of the fluid within the reservoir during operation, which I surmised as possible damage to the power steering pump's internals. Replaced a new power steering pump, fitted a new thermostat and also replaced an aluminum thermostat housing for increased reliability. As can be seen from the above pictures, it's a worthwhile upgrade to get done. Next was to flush the coolant system with the correct Mercedes coolant and replaced a new coolant overflow tank for that extra peace of mind! As a purely aesthetic touch, sent the air filter cover for chrome plating and it turned out fabulous! Although it wasn't the goal initially, the engine bay was now going to look really good!:-)
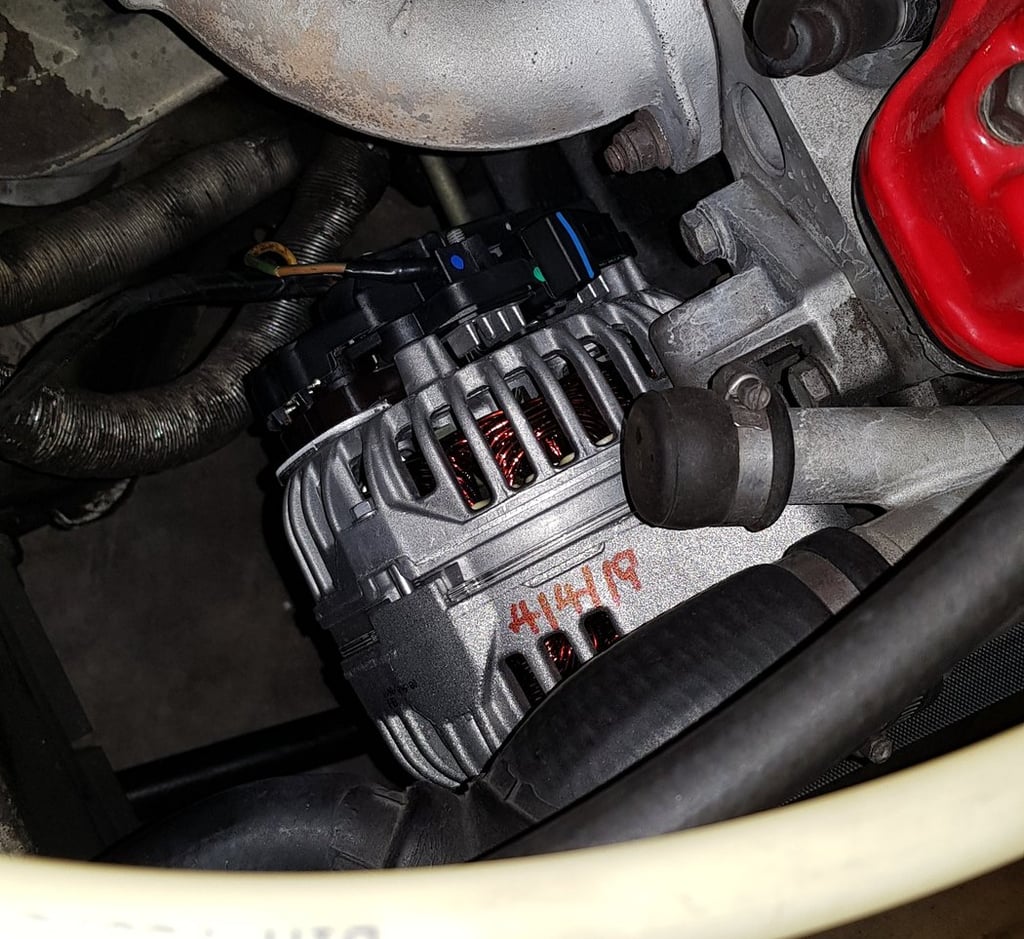
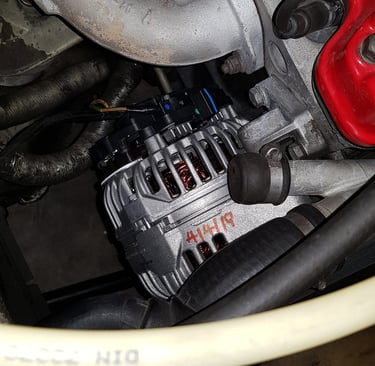
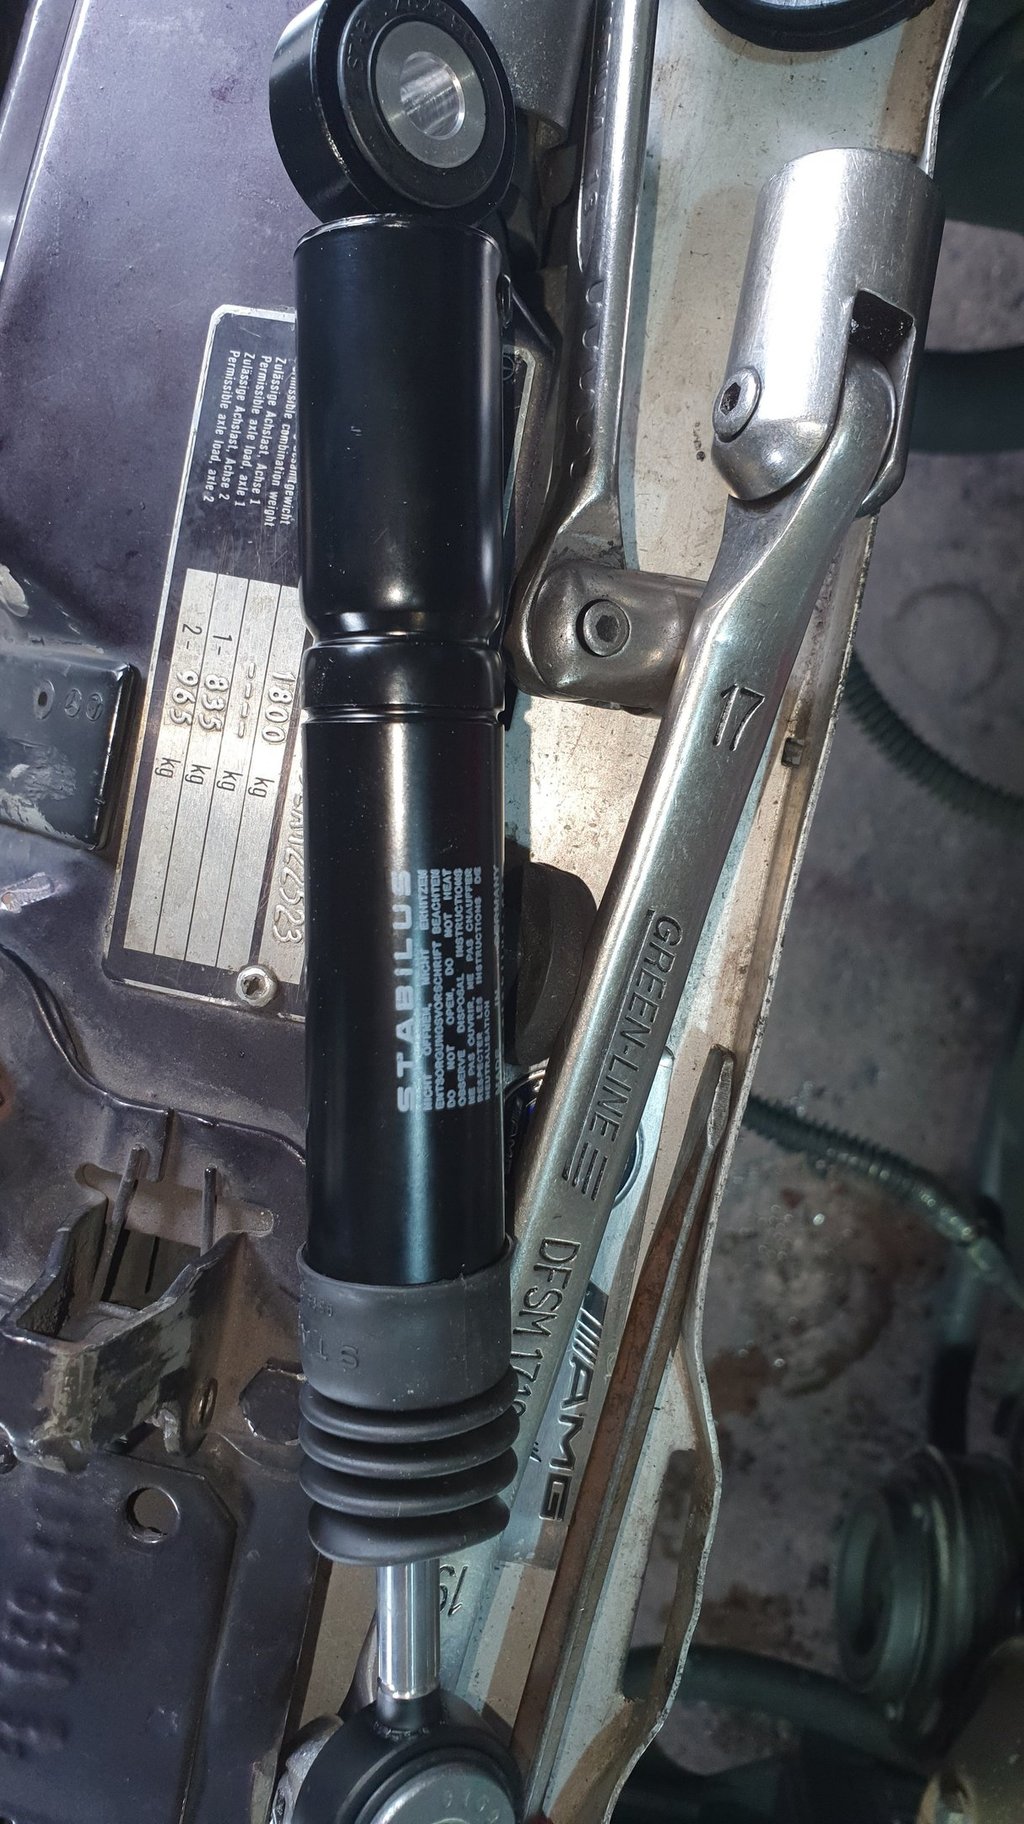
Through testing the battery voltages with the alternator running, determined that the alternator was on the way out. Replaced a brand new Bosch unit for peace of mind. Replaced the fan belt and damper at the same time.
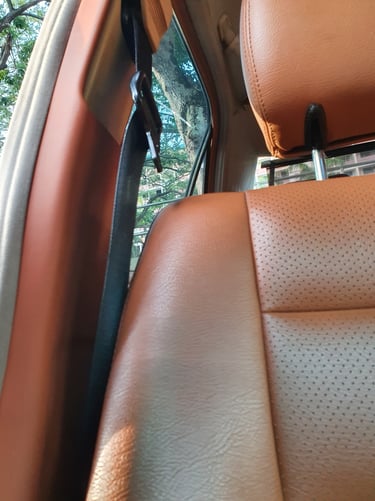
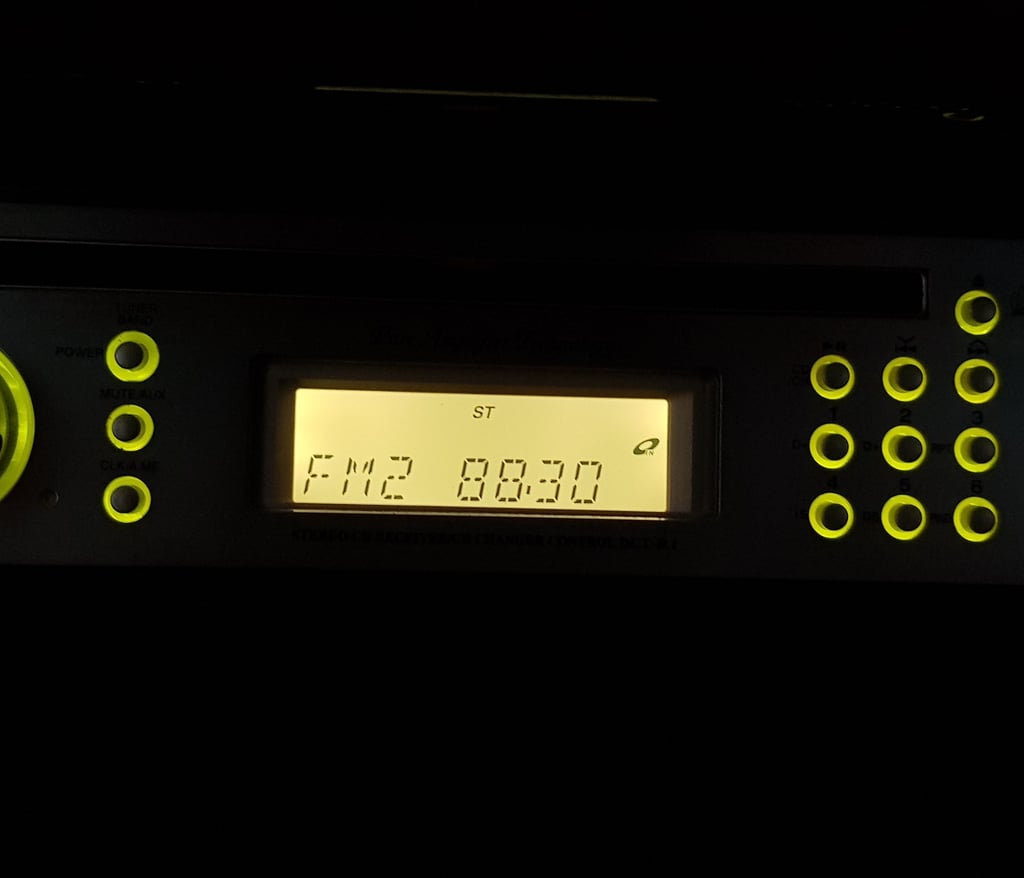
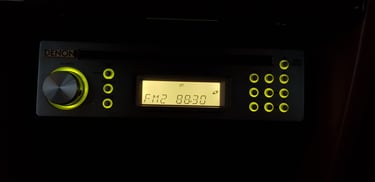
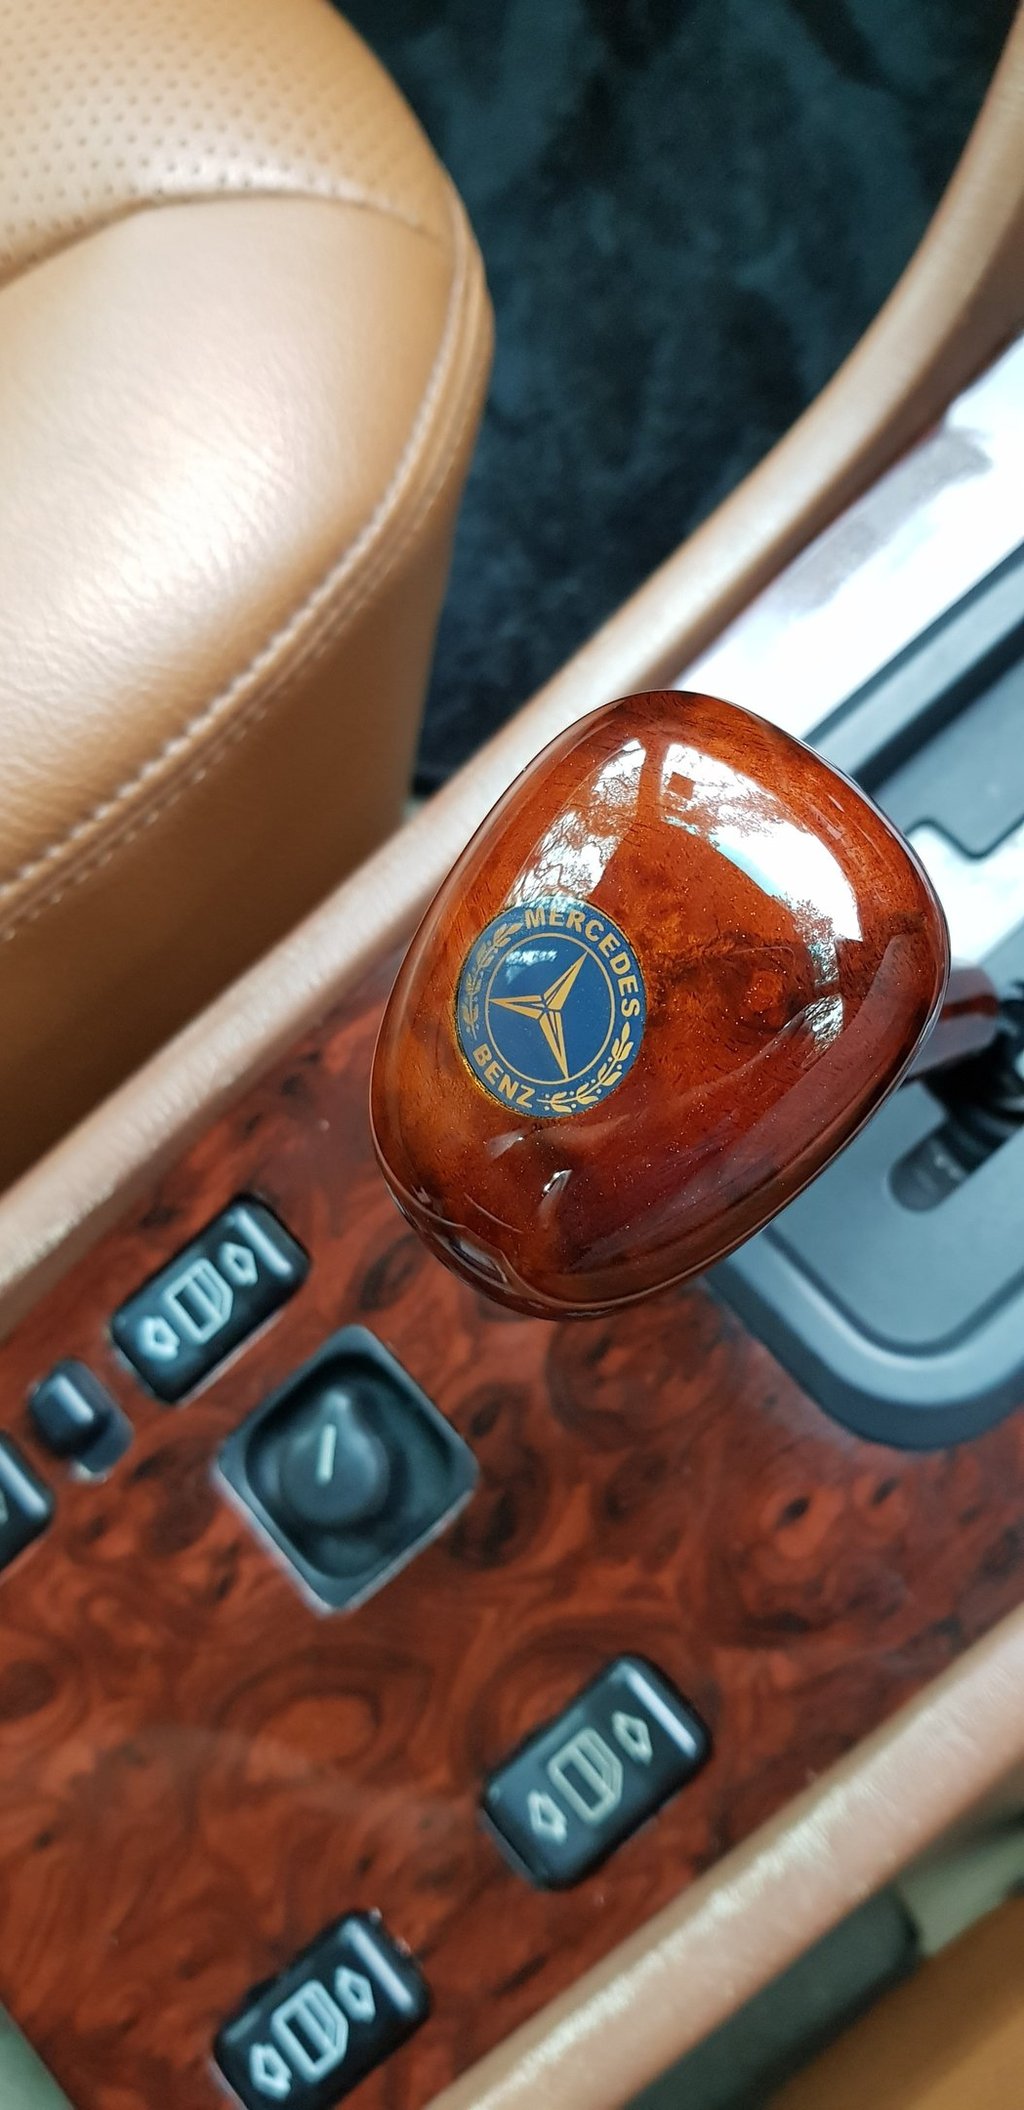
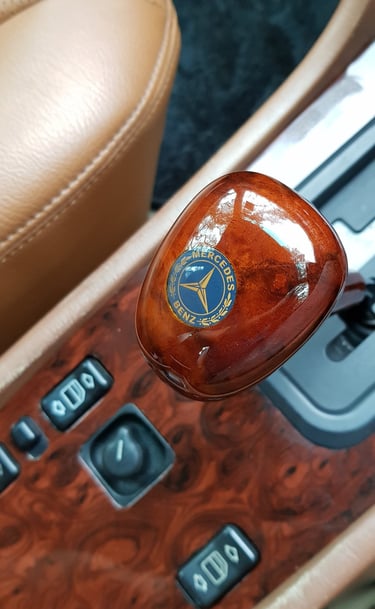
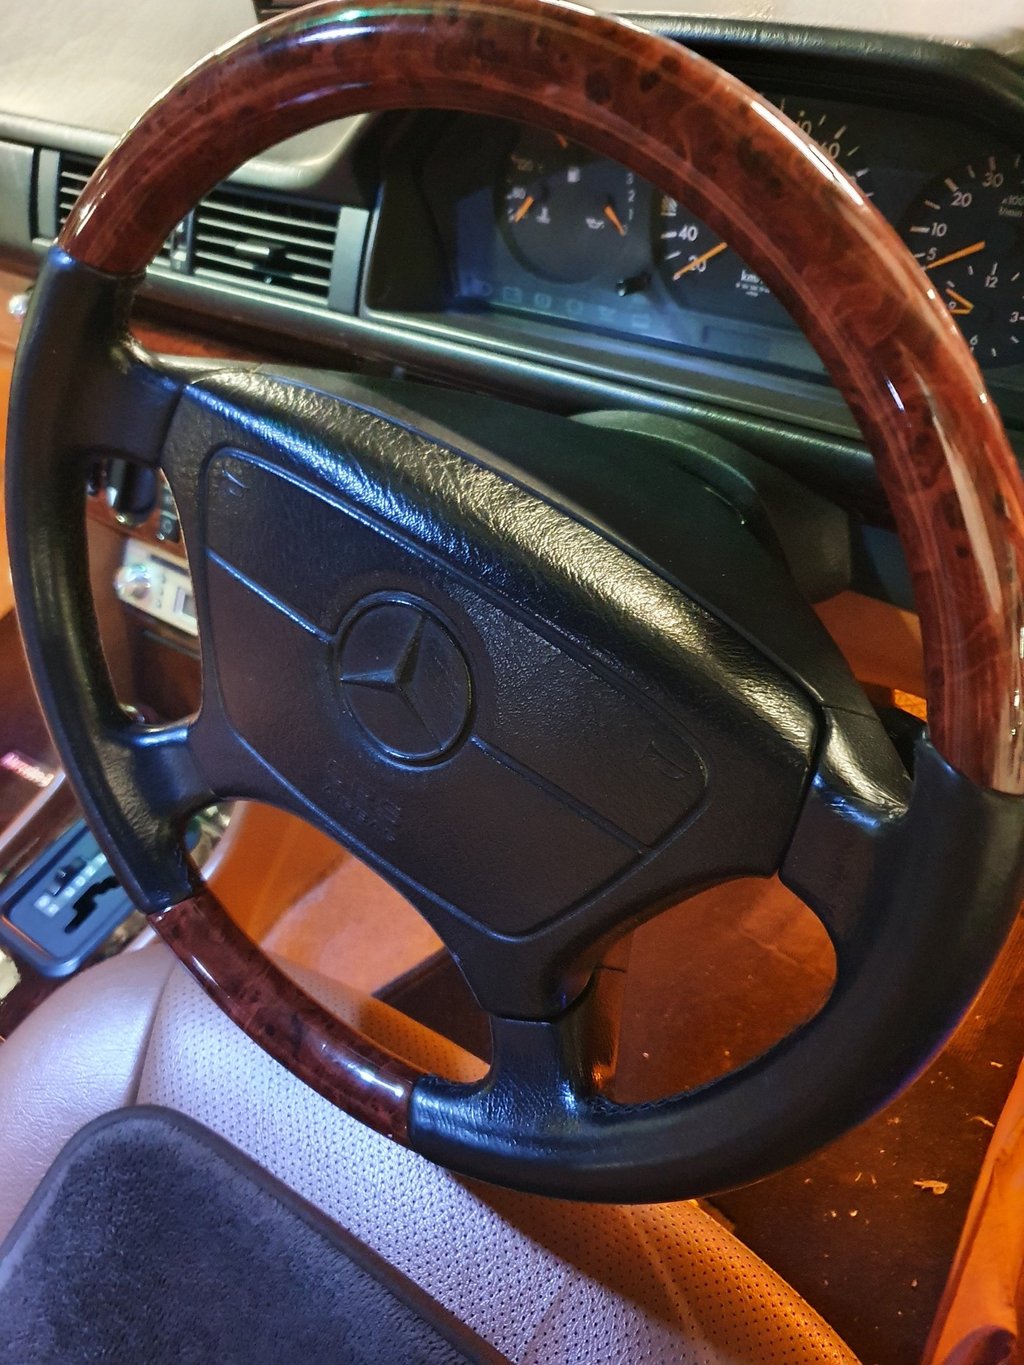
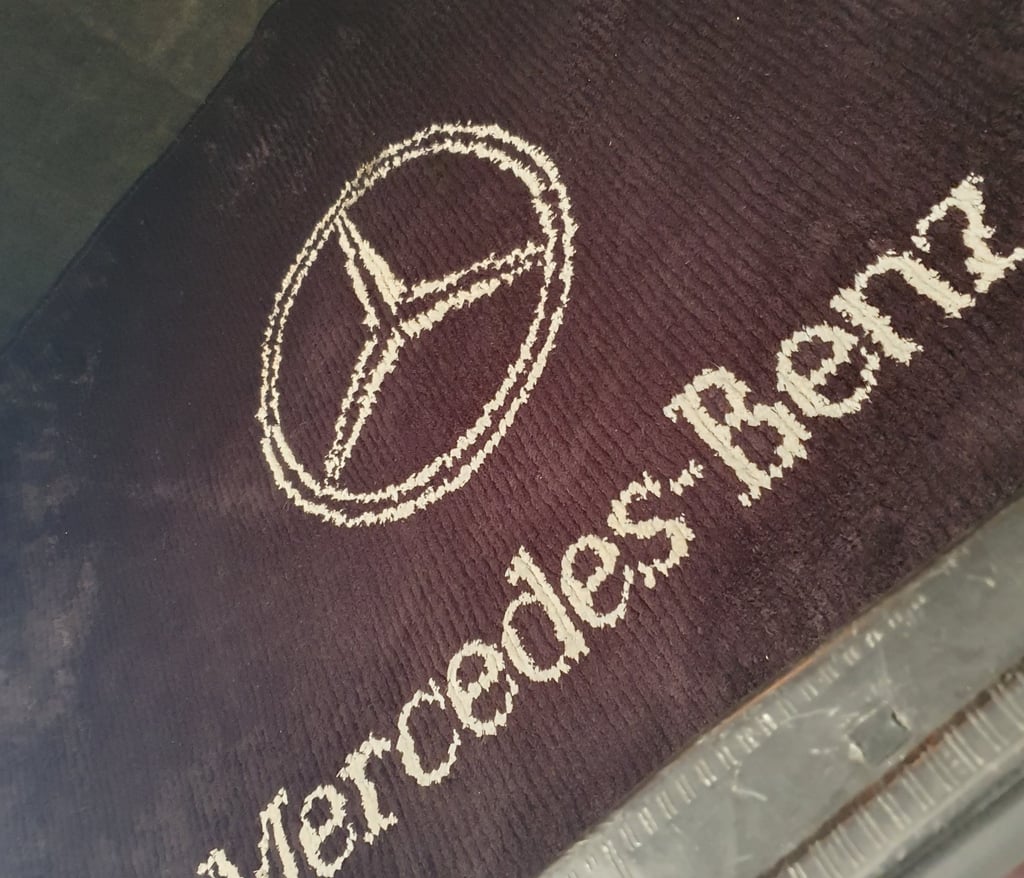
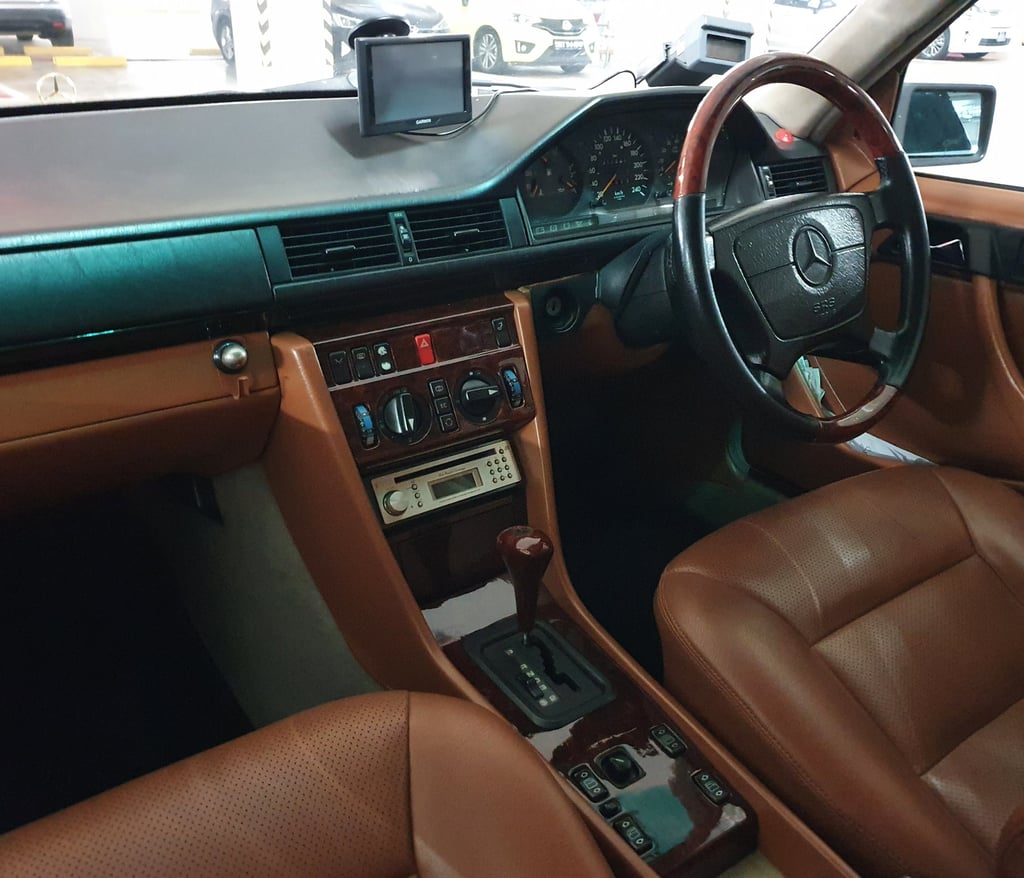
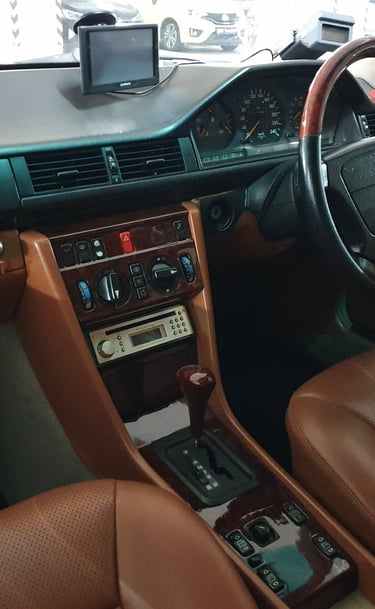
While waiting for the undercarriage parts to arrive, decided to focus on some pressing issues with the interior. The center console controls were not fully functional and the center console wood panel and buttons were worn. Had the dash, center console, footwell, A-pillar panels, B-pillar seat belt trims and door panels refurbished and replaced new aircon controls, center console wood panels and switches. Also had a shop custom make a complete set of interior carpets with the Mercedes logo and put in a new rear boot carpet sourced from Yanase Japan. The old leather shift knob was quite worn and replaced it with a new Mercedes Walnut shift knob which matched the rest. Next, turned my attention to the audio system and sourced a period correct vintage Denon R1 single-DIN head unit which had fantastic audio quality! The rear power antenna was also replaced with an original Panasonic unit as the current unit had stopped going up and down. And to top it off, sourced a leather and wood steering to replace the original leather steering which had seen better days. Almost everything was looking brand new and the interior was now looking pretty good!
With the engine bay looking all spick and span, finally got down to doing a full service, starting with fresh 10w40 Shell Synthetic oil and a new set of spark plugs. Next were new air and aircon filters. Also replaced the transmission fluid and filter. At this juncture, did an inspection of the entire undercarriage and identified all the undercarriage components that needed replacement and made a list of items to be ordered.
This concludes Part 1 of the restoration blog for the 1985 Mercedes W124 230E. Stay tuned for Part 2!


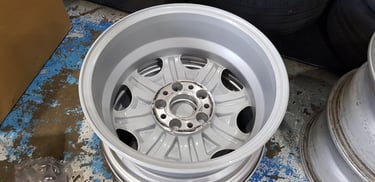
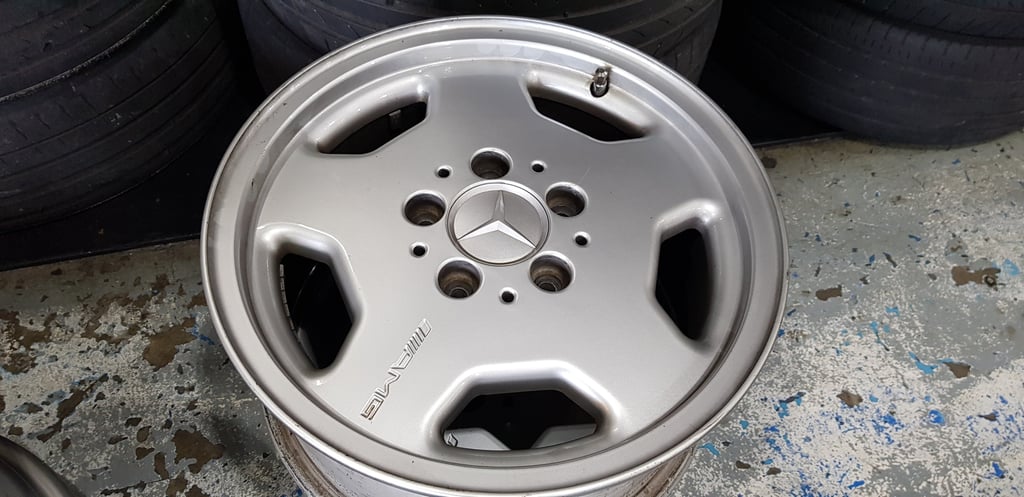
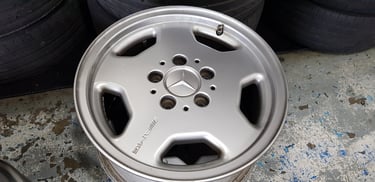
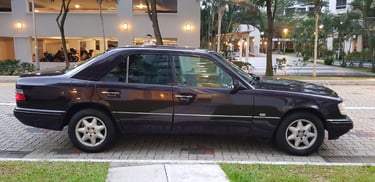
The W124 goes well with the AMG Monoblock look. Sourced a mint set of 15x7 ET37 AMG Monoblock wheels and new Michelin tires to spruce up the exterior and ride quality. This would only go on after the undercarriage work was completed. :-)
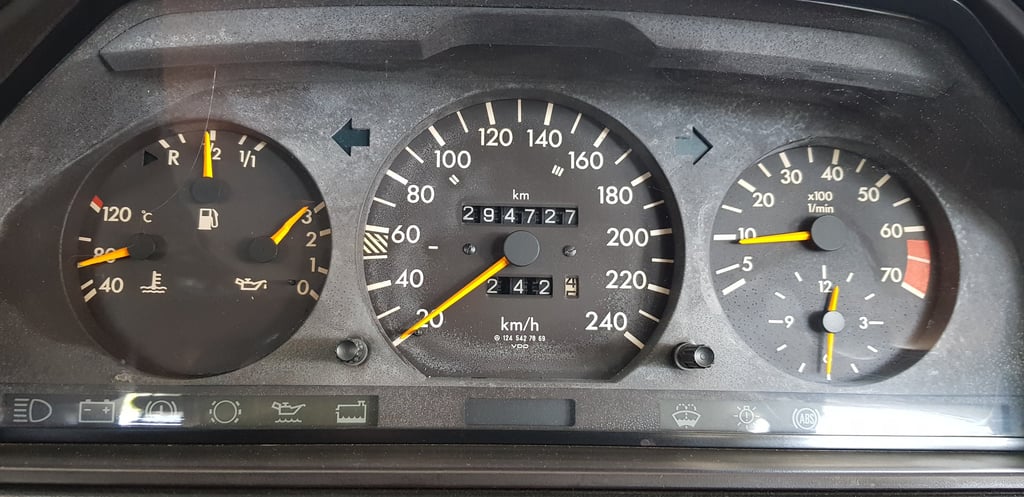
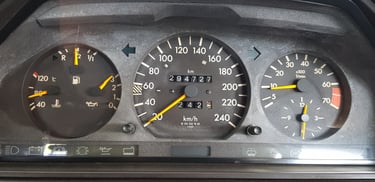
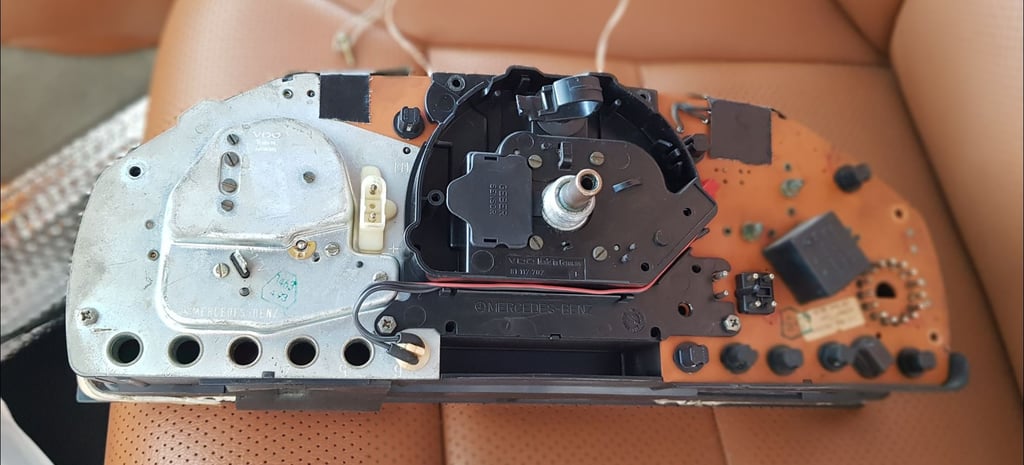
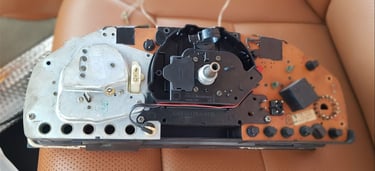
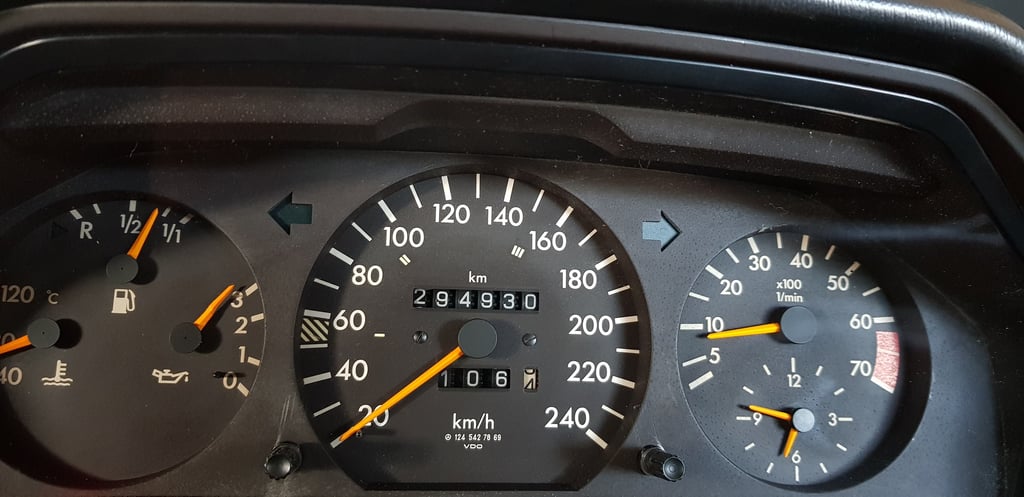
Next on the agenda was to refurbish the cluster and remove the ugly "white dots" and regain the matt black surface finish without repainting. As I did not want to risk cracking the plexiglass, decided that the best approach would be to remove all the 3 gauges to reach the cluster face and wiped down all surfaces down with wet towels. It is important to note that this requires lotsa patience and time, especially when trying to get to all the nooks and crannies of the cluster and wiping the surfaces repeatedly. Take a look at the before and after. For sure, it was worth the effort! To top things off, replaced the cluster bulbs with LED ones as well.